healing

Superfood Hot Chocolate

superfoodhotchocolate-featured-image.jpg

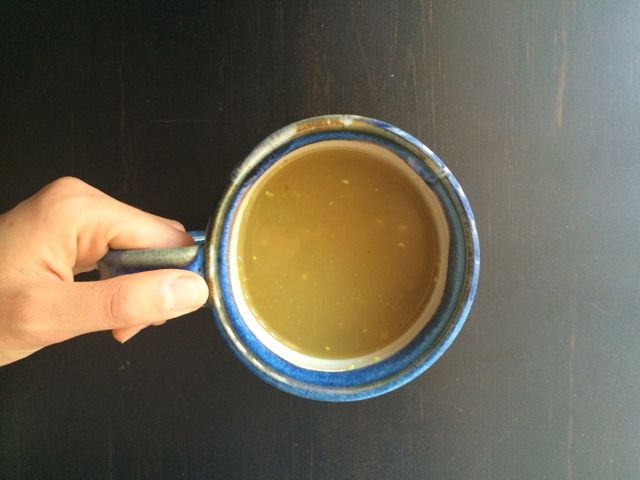
Every year I come home to visit for the holidays with a new favorite drink or food that I'm eager to share with my family. This year, I've been on a hot chocolate kick for about a month now, and it's been a healing and delicious journey. This has been the morning drink of choice at my house for the past few days, and I encourage you to give it a try if you're looking for a cozy nourishing start to your day. Especially around the stressful holiday season, starting with a warm pre-digested drink like this will sooth the digestive system instead of causing more stress first thing in the morning. You'll feel lighter and more energized.

Ingredients

2 cups herbal tea -Any herbal tea of choice works.I use a loose leaf mixture of dandelion root, holy basil, gynostemma, and chaga mushroom. (I order my herbs online from Mountain Rose Herbs)

2 Tablespoons hemp seeds

1 Tablespoon raw cacao powder

1 Tablespoon coconut oil

1 teaspoon raw honey

1 teaspoon raw maca powder - Boosts energy, balances mood, influences stamina, and aids sexual function

1/4-1/2 teaspoon ashwagandha powder - An adaptogenic herb that helps the body deal with stress, strengthens the immune system, and boosts energy. 

1/4 teaspoon he shou wu - Strengthens the immune system, supports adrenals, calms the nervous system, and maintains youthful condition and color of hair. 

1/4 teaspoon vanilla

1-2 drops of vanilla stevia (Omica Organics)

Pinch of sea salt

Pinch of cayenne pepper

superfoodhotchocolate

Procedure

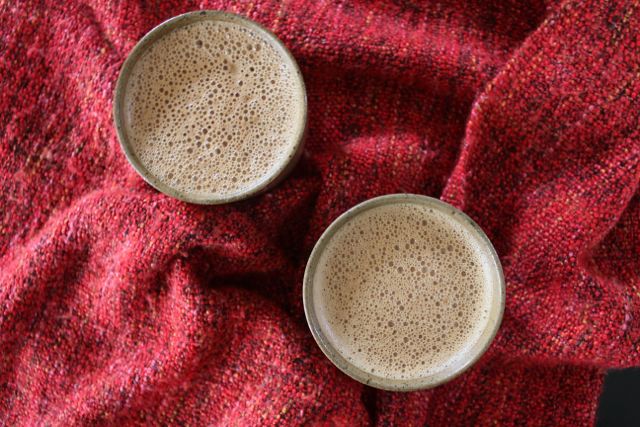
  1. Place hot tea and remaining ingredients in a blender and blend until creamy and frothy.

Note: This drink is not by all means limited to these ingredients only. My hot chocolate is never the same. I like to switch off using different superfoods depending on how I feel that day. Play around with what calls you. Other ingredients I often use: mucuna, shilajit, lucuma, stevia, dates instead of honey, tahini, cinnamon, medicinal mushroom powders (reishi, cordyceps, turkey tail, shiitake, etc.), and Everlasting Vitality & Youth.

Let me know what ingredients you try and how your specialty superfood hot chocolate turns out.

Enjoy & Happy Holidays!

x, Giovanna

Foods to Eat After Giving Birth to Save Time and Stay Nourished + Rice Porridge Recipe

RicePorridge-featured-image.jpg

I had the great pleasure of being this week's 'Fab Friday Feature' at Chloe's blog from Chloe Jackman Photography. Learn what foods are best after giving birth and get the recipe for this beautiful rice porridge: Foods to Eat After Giving Birth to Save Time and Stay Nourished + Rice Porridge Recipe.

Ingredients

1 cup short-grain brown rice, soaked overnight

2 cups coconut milk (I recommend homemade or canned by  ‘Native Forest’ – organic and BPA-free)

2 teaspoons vanilla

1 teaspoon ground cinnamon or cinnamon stick

1 teaspoon minced fresh ginger or ground ginger

½ teaspoon ground cardamom

¼ teaspoon sea salt


Toppings:

½ cup unsweetened shredded coconut, toasted

½ cup hemp seeds

½ cup fresh strawberries, chopped

¼ cup fresh medjool dates, chopped

Extra coconut milk if desired

1 Tablespoons raw maca powder (optional, but will provide great hormonal balancing benefits), you can mix this in before adding the toppings


Procedure

1. Soak rice overnight or for at least 4 hours. Drain and rinse. Place in medium size pot with coconut milk, cinnamon, vanilla, ginger, cardamom, and sea salt.

2. Bring to a boil, lower heat, cover, and simmer for 45 minutes, until rice is cooked and it reaches a porridge consistency. Add water or more coconut milk if porridge becomes too thick.

3. Serve and stir in maca powder if using. Garnish with toasted coconut, hemp seeds, chopped strawberries, and chopped dates.

Serves 4


Homemade Coconut Milk + Coconut Milk Kefir

coconut-kefir-featured-image.jpg

You've probably heard me talk about probiotics already. Perhaps here. In my opinion, most health problems and symptoms are due to poor digestive system (gut) health. Since 70% of our immune system is located in our gut, when one system is compromised, so is the other. This is why I highly recommend eating fermented foods daily that contain probiotics to heal and repair imbalances in the gut. Examples of these foods include: coconut kefir, coconut yogurt, kimchi, sauerkraut, fermented vegetables, and coconut water kefir.

One way I get my probiotics is from delicious homemade coconut milk kefir. It's tart and perfect to drink by itself, blended in smoothies, or added to a bowl of fresh fruit and seeds.

Here I will show you how to make the coconut milk first, then the kefir using the milk. I hope you enjoy this easy but healing process.

coconut kefir

Homemade Coconut Milk

Ingredients

1 cup unsweetened shredded coconut

3 cups filtered or spring water

Vanilla flavor (optional)

1 teaspoon vanilla powder or extract

Pinch of stevia or raw honey

Procedure

  1. Blend ingredients in blender until smooth, about 2-3 minutes.
  2. Strain with a nut milk bag or fine mesh strainer. Squeeze solids to get all liquid out.
  3. Blend coconut milk with vanilla and sweetener if flavoring.
  4. Place in a glass bottle/jar and store in refrigerator.
Coconut Milk Kefir

Ingredients

3 cups homemade coconut milk (or 2 cans 'Native Forest' full-fat coconut milk - BPA free)

2 probiotic capsules

Procedure

  1. Blend coconut milk to get rid of any solid pieces.
  2. Place in a jar large enough to fit all of the milk and have some space at the top (you may also separate milk into two smaller jars). Mix in probiotics (open capsule and only use powder) with a wooden spoon. Avoid using metal because it kills probiotic bacteria, and avoid blending at high speed.
  3. Cover loosely and place in oven with pilot light on (do not turn on the oven!). Let sit for 24-48 hours, until it has reached your desired tartness. Taste it at 24 hours with a wooden or plastic spoon.
  4. Store in an air-tight container in the refrigerator. Good for up to 3 weeks.

Makes 3 cups 

I would love to hear in the comments from you about how your coconut milk & kefir turned out.

xo,

Giovanna


Healing Bone Broth

bone-broth-2.jpg

Bone broth is incredibly healing. It has been used for years to treat illnesses and speed up recovery and healing. Health benefits of bone broth:

  • Promotes healthy bones
  • Heals and supports gut health and digestion
  • Inhibits infection
  • Reduces joint pain
  • Reduces inflammation
  • Promotes healthy hair and nail growth.

Bone broth can be made with chicken, turkey, duck, lamb, or beef bones. I chose to use beef bone marrow for this one. It doesn't matter what you choose to use, but you must make sure they are organically-raised, pastured or grass-fed animals in order to get the health benefits.

Making bone broth can be a nurturing process if you allow it to be. The more love you put into it, the more healing and nutritious it will be for you and your family. It's a great staple to have at home. And the best part is that you can make huge batches like this one and store in the freezer to have for a few months. This will be your best health supplement. Use it as a base for soups, sauces, or drink it as is.

bone broth 3

Ingredients

3.5-4 pounds organic, grass-fed bones. I used beef bone marrow.

4 Tablespoons unfiltered apple cider vinegar

Filtered water, enough to fill pot

4 large kombu strips

4 Tablespoons dulse flakes

4 large carrots, roughly chopped

4 stalks celery, roughly chopped

1 bunch parsley

1/4 cup goji berries

1 Tablespoon organic ground turmeric or a large chunk of fresh turmeric (peeled)

Procedure:

  1. Place bones and apple cider vinegar in a large stock pot. Fill pot with water and let sit for 30 minutes with the heat off. The acid in the vinegar helps extract the minerals from the bones.
  2. Turn on heat and bring to a simmer, removing scum that rises to the surface for the first hour of cooking. Cover loosely and continue simmering on low for 24-48 hours. The longer, the better. I simmered it for about 28 hours total. You will need to add water along the way to keep bones completely covered.
  3. Add remaining ingredients for the last hour of cooking.
  4. Strain broth and place in air tight containers. Let cool completely before storing in the refrigerator. Broth will keep in the refrigerator for 5 days or in the freezer for a few months.
  5. The next day, there will be a layer of fat on the surface. You can discard this, use it for cooking, or stir it back in - it contains valuable nutrients.

Makes ~20-24 cups 

Don't be afraid to use your choice of herbs, spices, or vegetables to give it your own therapeutic touch.

Happy healing!

Will you be making this therapeutic drink? Let me know in the comments below.