vegetable

Roasted Acorn Squash with Herb Dressing

Winter squashe might be one of my favorite things about the fall. Aren't they just so delicious?

You can't ever go wrong with a baked squash of any kind. This recipe here is a simple go-to of mine that takes little preparation and packs a lot of flavor. 

What's best about winter squash varieties is that they are super nutritious. They are high in antioxidants (hence their bright color), contain fiber, and have good amounts of calcium, magnesium, potassium, and iron.

Squash is meant to be comforting on all levels for this time of year. Get cooking! 


Ingredients

Roasted Acorn Squash:

1 acorn squash

1-2 Tablespoon coconut oil, melted, enough to coat squash

Pinch of sea salt and black pepper


Herb Dressing:

½ cup parsley, finely chopped

½ cup cilantro, finely chopped

¼ cup basil, finely chopped

½ - 1 cup extra virgin olive oil, enough to cover herbs

Juice of ½ lemon

Sea salt and black pepper, to taste

Pinch of chili flakes, to taste


giosquash_5.jpg

Procedure

To cook squash:

  1. Preheat oven to 400 F.
  2. Cut squash in half from top to bottom. Scrape out seeds with a spoon and save (you can toast them or blend in smoothies). Cut into ¾-inch thick half moons.
  3. Toss squash with coconut oil, sea salt, and black pepper on a baking sheet lined with parchment paper.
  4. Spread out evenly and bake for about 30 minutes, turning at 15 minutes, until squash is soft in the middle.
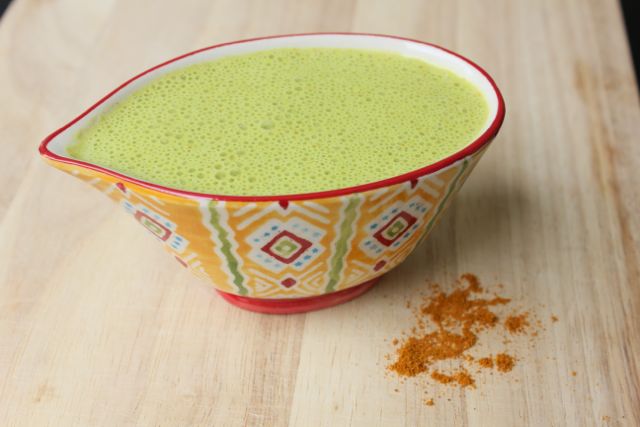
To make dressing:

  1. Place finely chopped herbs in a small bowl.
  2. Add olive oil slowly while whisking. Add enough olive oil to cover and create a dressing-like consistency that can be poured.
  3. Season with lemon juice, sea salt, black pepper, and chili flakes until you reach desired taste.
  4. Serve cooked squash and drizzle herb dressing over it.

Serves 2-3

This recipe was created for Oh My Drifter and photographed by the lovely Micaela

Spiced Sweet Potato Wedges + Avocado Superfood Dip

Spiced-sweet-potatoes-featured-image.jpg

There's something about sweet potatoes. Don't you love them? I do! Sweet potatoes are the healthy alternative to regular potatoes because they actually pack a punch of essential vitamins and minerals. They are anti-inflammatory and help balance blood sugar. The words 'yams' and 'sweet potatoes' are often interchangeable. They are actually two different vegetables, but are both great options.

Staying clear of all whites is always best (white breads, flours, sugars, etc.), but there is an exception... Japanese sweet potatoes. They are white-light yellow inside and have a purple skin. These are actually the most nutrient dense of all sweet potatoes. So enjoy your sweet potatoes/yams, especially the Japanese ones!

Spiced Sweet Potato Wedges

Ingredients

2 sweet potatoes, peeled and cut into wedges (I used yam & Japanese sweet potato)

2 Tablespoons melted coconut oil

1 teaspoon chili powder

1 teaspoon cinnamon

1 teaspoon turmeric

Pinch of cayenne

Sea salt and black pepper, to taste

Procedure

  1. Preheat oven to 425 F.
  2. Place sweet potato wedges in an oven safe dish.
  3. Combine coconut oil and spices in a small bowl and drizzle over potatoes. Mix to coat well.
  4. Bake for 25-30 minutes, until tender. Turn broiler on towards the end if you want them crispy.
  5. Serve with avocado superfood dip (recipe below).
Spiced sweet potatoes

Avocado Superfood Dip

Ingredients

1 ripe avocado

2 Tablespoons raw tahini

1 teaspoon spirulina (I use HealthForce brand)

1 teaspoon raw honey

Juice of 1/2 lemon

1/2 cup water, or to desired consistency

Procedure

  1. Place all ingredients in blender and blend until smooth. Garnish with fresh herbs and enjoy.

What's your favorite way to eat sweet potatoes? Share your creations and recipes below or on social media with #apurifiedlife

Summer Minty Gazpacho

minty-gazpacho-featured-image.jpg

Perfect for a summer day. Gazpacho is also a great way to get in a variety of vegetables at once. The beauty of this recipe is that you can't go wrong with what ingredients you use. This is all I had on hand, but feel free to use any vegetables you'd like (still including tomatoes though). I would throw in some cauliflower and bell pepper, or broccoli, yum!

Ingredients

2 pounds ripe heirloom or early girl tomatoes, cores removed and roughly chopped

1 cucumber, roughly chopped

1 small red onion, peeled and roughly chopped

2 cloves garlic, peeled and roughly chopped

1/4 cup fresh mint leaves

2 Tablespoons red wine vinegar or sherry vinegar

2 Tablespoons extra virgin olive oil

Juice of 1/2 lemon

Chili flakes, to taste

Sea salt, to taste

minty gazpacho

Procedure

  1. Place all ingredients in a food processor. Pulse until combined, but leave chunks for texture. I use "pulse" setting instead of "process" setting to make sure not to over process. Taste and adjust seasoning.
  2. Plate and top with toppings of choice.

Serves 4

Enjoy! x

Avocado Garbanzo Bean Salad

Chickpea-salad-featured-image.jpg

Do you often get bloated and gassy when you eat beans? Legumes can actually provide great health benefits, but only if you're digesting them properly. If our digestive tract is inflamed (gas/bloating), it does not absorb any nutrients.

Here's the trick to reducing digestive discomforts with beans:

  1. Before you cook them, soak them overnight in a bowl of filtered water.
  2. Rinse after soaking and cook in clean water with a piece of Kombu (seaweed). The Kombu also provides a natural saltiness without needing to add salt to the beans.

Garbanzo beans are high in fiber and can be great for digestive support (when previously soaked). They also support cardiovascular health and keep blood sugar regulated because of their fiber and protein content.

This salad is perfect for a warm summer day. It's refreshing and easy to make. The only thing that needs to be cooked are the garbanzo beans.

I know you will enjoy this one.

Ingredients Chickpea salad 1

1 1/2 cups cooked garbanzo beans (soaked for at least 8 hours before cooking)

1 1/2 cup chopped vegetables of choice (radish, summer squash, zucchini, celery, cucumber, bell pepper, carrot)

1/2 avocado

1/2 teaspoon dijon mustard

1 teaspoon raw unfiltered apple cider vinegar

Juice of 1 lime

Pinch of celtic sea salt

2 Tablespoons chopped fresh parsley (Or any herb - parsley, dill, cilantro, basil, mint)

Pinch of cayenne pepper

Pinch of smoked paprika

Procedure

  1. Coarsely mash garbanzo beans in a medium-sized bowl with potato masher or back of a fork (mashed garbanzo beans pictured above). Add chopped vegetables.
  2. In a separate bowl, mash avocado with dijon mustard, apple cider vinegar, lime juice, and sea salt.
  3. Add avocado to garbanzo and vegetable mix and combine to coat well.
  4. Add herbs and spices and mix once more. Taste and adjust seasoning.

Serves 2-3

I made delicious wraps with this garbanzo bean salad. I used collard greens for the wraps, but any leafy green will work. Sprinkle with some lemon juice, top with sauerkraut or homemade salsa, and you've got yourself an amazing and nourishing meal.

chickpea salad 2

Are you new to soaking beans, nuts, and grains? What methods do you use to help your digestion?

Probiotics + Sauerkraut Recipe

Sauerkraut-featured-image.jpg

Our digestive tract contains both good and bad bacteria. Probiotics are what we call the friendly bacteria, which promote a healthy digestive system and are essential for good health. There are hundreds of types of probiotics. Some of the largest and most common are Lactobacillus and Bifidobacterium. These two support colon health and promote healthy bowel movements. Why is this important to know?

Well, the gut is the heart of most health conditions and we don't even know it. A happy gut is one that has a good balance of good and bad bacteria. The average american tends to feed the 'bad bacteria' more than the good. This provides a imbalanced or highly acidic environment in the gut, which comes form sugar, wheat, alcohol, processed foods, high-stress, birth control pills, radiation exposure, over-the-counter medications, and antibiotics.

A bacterial imbalance in the gut results in:

  • Impaired immune system
  • Impaired digestive system
  • Malabsorption of vitamins and minerals from food - vitamin deficiencies
  • Yeast and fungal infections (Candida)
  • Digestive issues (constipation, diarrhea, IBS, Chron's disease, ulcerative colitis)
  • Skin issues
  • Fatigue
  • Food allergies

This is why it's crucial to eliminate foods and lifestyle habits that destroy the gut lining, and incorporate more fermented foods that are packed with probiotics to help rebalance the bacteria in the gut. There are also probiotic supplements, but having the real deal (fermented foods) is the best way to get them.

My favorite fermented foods are:

  • Sauerkraut
  • Kimchi
  • Fermented vegetables
  • Coconut water kefir
  • Kombucha
  • Coconut yogurt

If you're new to adding probiotics into your diet, start slowly because your body will go into a state of detoxification and you might experiences symptoms such as bloating and possibly skin issues, but you will soon be feeling great and seeing a great difference in digestion and overall health. Then you can move up to having them with every meal (recommended!).

I've been experimenting with making my own ferments at home, and reality is that they're so easy to make and so much more cost effective.

Today I am sharing with you the simplest sauerkraut recipe ever. Hope you enjoy making it!

Ingredients Sauerkraut

1 head purple cabbage, shredded, save outer leaf

1 Tablespoon Sea salt (must be unrefined sea salt)

Procedure

  1. Place the shredded cabbage in a large glass bowl.
  2. Sprinkle with sea salt and massage with hands until wilted and juice covers bottom of the bowl, 3-5 minutes.
  3. Start filling a glass jar by scooping some of the cabbage with it's juice into it with a wooden spoon. Best to use glass or wood because any type of metal will kill off beneficial bacteria. Press down firmly with spoon after each scoop to pack it in tightly. Add remaining cabbage juice to fill jar. Take cabbage leaf that you initially saved, fold, and place at the surface of jar to keep air out and keep cabbage submerged in juice (press down).
  4. Cover jar tightly, making sure no air gets in. Leave on counter and press down on cabbage each day for about 3 days. Taste after 3 days (with wooden spoon). You can ferment it until it reaches your desired taste. Foam and bubbles on the surface are normal and signs of healthy fermentation. When done, cover with a lid and keep in refrigerator.

Enjoy!

Are you new to fermented foods? What are your favorite probiotic-rich foods?


Cauliflower Mash

Cauliflower-mash-featured-image.jpg

Cauliflower is often an underestimated. It seems like such a plain vegetable, yet it's loaded with nutrients and health benefits. Nutritional Highlights of Cauliflower:

  • High in vitamin C - immune support, cardiovascular support
  • Rich in antioxidant phytonutrients - help lower the risk of developing different types of cancer
  • Vitamin K - highly anti-inflammatory
  • Sulphur - anti-inflammatory, shown to kill cancer stem cells, helps detoxification
  • Vitamin B6 & Choline - two B vitamins important for brain health
  • Fiber - aids digestion


Cauliflower mash


This side dish has been one of my go-to's at home lately. My personal chef clients love it as well. It's comforting and doesn't leave you feeling stuffed. It makes a great dairy-free and low-carb alternative to mashed potatoes, especially for those watching their weight. It even tastes better, in my opinion.

I make a batch at the beginning of the week and then sauté or roast a ton of vegetables to go with it. Great for lunch, dinner, or snack.

Ingredients 

1 Tablespoon extra virgin coconut oil

1 yellow onion, sliced

1 large head cauliflower, chopped

1-2 cloves garlic, mashed

1/4 - 1/2 cup water

1 Tablespoon extra virgin olive oil or coconut oil (melted)

Sea salt and black pepper, to taste

Fresh herbs such as chives, parsley, or cilantro to garnish (optional)

Procedure

  1. Heat coconut oil in a large pan or pot. Add onion and sauté over medium heat until slightly softened, about 3 minutes.
  2. Add chopped cauliflower, garlic, and water (enough water to cover the bottom of the pan). Cover the pot with a tight fitting lid and turn down heat to low. Simmer for 5-10 minutes, stirring occasionally and checking to make sure there is still liquid at the bottom of the pan. If water has evaporates, add a little more. Steam until cauliflower is slightly tender.
  3. Remove from the heat and place in a food processor or high-speed blender. Season with oil, sea salt, and black pepper. Blend until it reaches mashed potato consistency. Taste and adjust seasoning. Mix in herbs at this time if desired, or garnish with them.

Note: If you do not have a food processor or high-speed blender, you may mash cauliflower with a potato masher. Cauliflower might need to be cooked a bit more to make it easier.

Serves 2-4

What's your favorite way to prepare cauliflower?


Balsamic-Glazed Brussels Sprouts

balsamic-brussels-featured-image.jpg

I don't know about you, but I LOVE brussels sprouts. They are currently in season and I just can't get enough of them. There are various healthy ways to cook brussels sprouts. You can roast, sauté, steam, or shred them and use in a salad. I like to roast them and play around with different seasonings.

Balsamic-glazed has been my go-to lately because it's such a simple ingredient that gives them so much flavor. Throw these tasty brussels sprouts on a salad, on a bed of lentils or grains, have with chicken or fish, or have them as a snack.

Ingredientsbalsamic brussels sprouts

1 pound brussels sprouts

1/2 Tablespoon coconut oil, melted

2 Tablespoons balsamic vinegar

pinch of sea salt and black pepper

Procedure

  1. Preheat oven to 425 F.
  2. Remove outer layer of leaves from brussels sprouts and cut in half. Rinse and drain. Place in a baking dish and drizzle with melted coconut oil, balsamic vinegar, sea salt and black pepper. Roast in oven for 15-25 minutes until tender, check at 10 minutes and give them a stir. Serve.

Serves 2-3

3 Minute Green Curry Sauce + Vegetable Curry Dish

curry-sauce-feature-image.jpg

There are many many types of curry sauces out there. I like to keep mine simple, but flavorful. This sauce took me 3 minutes to make and goes great on vegetables, meats, whole grain, and on salads as dressing. I like to make a batch and use it different ways throughout the week. It keeps for about 5 days in the refrigerator. Below is a recipe for my curry sauce and a very simple and delicious vegetable curry side dish (or main dish with the addition of a good quality protein: raw nuts or seeds, grass-fed chicken, pasture-raised eggs, goat cheese).

Curry Sauce

Ingredients

1/2 white or yellow onion, coarsely chopped

1 can coconut milk

1/2 lemon, juiced

1 garlic clove

2 T organic curry powder

handful spinach or basil

sea salt and black pepper

Procedure

  1. Place all ingredients into blender and blend until smooth. The more greens you add, the greener the sauce will turn out and the flavor might change a bit. Play around with it and season to your liking.

vegetable curry dish

Vegetable Curry Dish

Ingredients

1 Tablespoon coconut oil

1 head cauliflower, chopped into bite size pieces

1/2 pound green beans, ends trimmed and halved

1 yellow squash, sliced and halved

sea salt

1/2 cup curry sauce, or more to coat all vegetables

Note: you can use any vegetables you'd like for this dish (carrots, cauliflower, zucchini, squash, sweet potatoes, green beans, broccoli, mushrooms)

Procedure

  1. Heat coconut oil in a medium-size pan. Add vegetables and a pinch of sea salt and sauté until tender, stirring occasionally. Add curry sauce to pan and continue cooking for a few extra minutes until vegetables are cooked through and sauce heats up.

Serves 4-6 


Massaging Raw Kale [Video]

IMG_7011.jpg

I know what you're wondering. What the heck does massaging kale mean and why would I want to do that?

Kale is a very powerful leafy green because it's packed with nutrients. But raw kale is tough, fibrous, and very bitter, making it hard to digest. It is recommended to lightly steam, sauté, or massage kale before eating it in order for its fibers to bind better with acids in the digestive tract. The more digestible kale is, the better its nutrients are absorbed. Massaging kale is just a simple way to aid digestion and make it less bitter without having to cook it. Once you've massaged kale, you can use it to make a salad or side dish.

Health benefits of kale:

  • Lowers cholesterol
  • Anti-inflammatory
  • Lowers cancer risk
  • Detoxifies the body
  • High in antioxidants
  • High in vitamin K, vitamin A, vitamin C
  • High in manganese, fiber, copper, calcium, iron, potassium, and tryptophan

How to massage raw kale:

  1. Place chopped raw kale in a bowl. Sprinkle with sea salt and lemon juice and massage with both hands for 2-5 minutes, until wilted and dark green.

Any variety of kale works. You can also get creative and dress it up with other ingredients such as tahini, extra virgin olive oil, avocado, or nut butter.

Source: whfoods.com