gluten free

Scrumptious Berry Crumble {Gluten-Free}

Isn't berry season the best season ever?!

Some of nature's best candy, in my opinion. 

I've noticed that every year for the past 3 years, this is the first dessert I make with berries when they come around. It's just too good and simple not to.

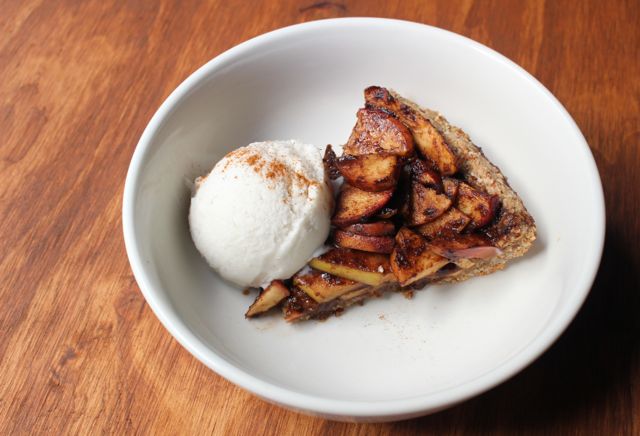
Goes extra well with some creamy coconut ice cream. 

Indulge without guilt with this gluten-free and refined sugar-free dessert. 


Ingredients

Berry Layer:

3 1/2 cups mixed berries (raspberries, blackberries, blueberries)

1 Tablespoon coconut sugar


Crumble Layer:

2 cups gluten-free rolled oats

1/2 cup brown rice flour

1/4 cup coconut sugar

2 teaspoons goji extract powder

1 teaspoon lucuma

1/2 teaspoon cinnamon

1/4 teaspoon cardamom

1/4 teaspoon vanilla bean or vanilla extract

Pinch of sea salt

3/4 cup ghee/clarified butter, diced

Procedure

  1. Preheat oven to 350 F. 
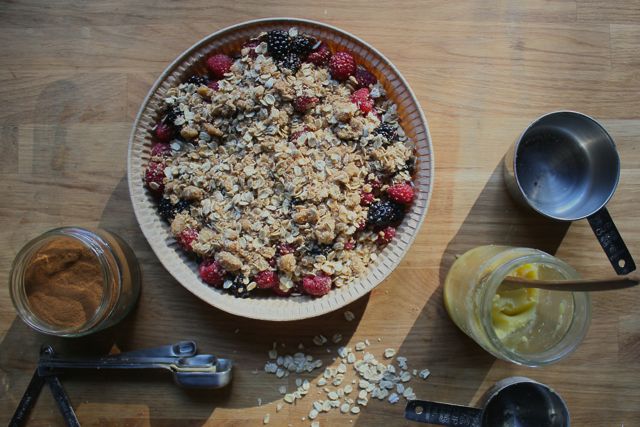
  2. To make berry layer: Toss berries with coconut sugar in a medium-size bowl and place in your baking dish. 
  3. To make crumble: Place all ingredients, except ghee, in a large bowl and combine well. Add ghee and press down with fork or pastry cutter to cut ghee into smaller pieces and blend into the mixture. 
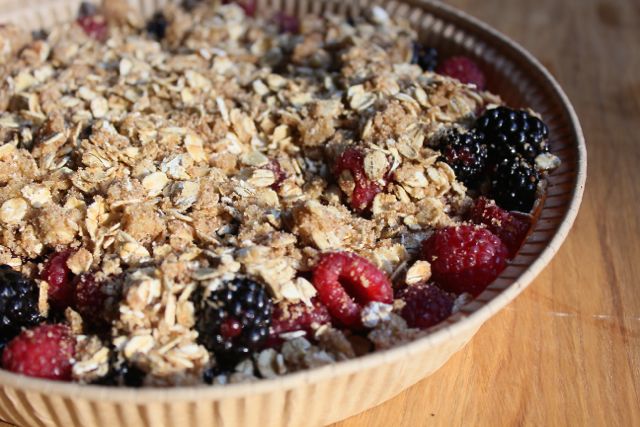
  4. Spread out crumble evenly over berries. 
  5. Bake for 30-40 minutes, until berries are soft and crumble is browned (not burnt). 

Recipe and Photos by Giovanna Garcia


Wholesome Holiday Thumbprint Cookies

'Tis the season for all the indulgent (and healthy) things! 

Yes, this time of year we are presented with treats everywhere we go, but I like to always find a way to bring in some nourishment into the mix. For me, it starts with completely erasing the story of healthy needing to be boring and indulgent needing to be 'bad for you.'

The quality of ingredients is key when making anything healthy yet still indulgent. When we use organic and unrefined ingredients, our body actually knows how to process them and there is no inflammation or sluggishness involved. You truly can have your cake and eat it too. 

I've been making these cookies for the past month for clients, friends, and events. They're a hit and super easy to make. Give them a try at your holiday gatherings coming up. 

Ingredients

Oat cookie base:

2 cups oat flour (blend gluten-free oats to make flour)

¼ cup coconut flour

½ teaspoon baking soda

⅓ cup coconut palm sugar

⅛ teaspoon sea salt

1 teaspoon vanilla

1 organic egg

⅓ cup melted coconut oil

2-3 Tablespoons water or almond milk, as needed


Fruit Jam Filling:

1 pound fresh cranberries (or fruit of choice)

3 Tablespoons pure maple syrup

Juice of 1 lemon


Melted organic dark chocolate to drizzle over baked cookies. Get some superfood chocolate here or make your own

Procedure

  1. Preheat oven to 350 F.

  2. To make cookie base: In a small bowl, mix flours, baking soda, coconut sugar, and sea salt. Set aside. In a large bowl, whisk together coconut oil, egg water or almond milk, and vanilla. Add dry mixture to wet mixture and whisk to combine well. Add enough liquid until dough comes together. Roll dough into 1-inch balls and flatten out slightly on a parchment-lined baking sheet. Use finger to make a dent in the middle of the cookie.

  3. To make jam: Place cranberries in a medium saucepan along with maple syrup and lemon juice. Let simmer, stirring occasionally, until cranberries start popping and become soft like a puree. Taste and adjust flavor to your liking.

  4. Add fruit jam to center of cookies. Bake for 10-12 minutes, until bottom of cookies is lightly browned.

  5. Melt chocolate in a double boiler. Place cookies on a parchment lined flat surface such as a cutting board or baking sheet. Drizzle with melted chocolate as much as you want. Place in refrigerator for a few minutes, until chocolate is firm. Remove from fridge and enjoy. Note: If you want to eat them while still warm, skip putting them in the fridge and enjoy with the chocolate melted over cookies. 

Makes ~20 cookies


Best Ever Apple Pie

ReishiApplePie2.jpg

What makes this apple pie the best ever is the love and quality ingredients that went into it. My lovely friend Julia from Dessert Medicine was visiting and we got busy in the kitchen. 

It's a wonderful experience to share space in the kitchen with someone and let each others intuitive powers flow and blend together. 

We had an abundance of apples and a vision of an apple pie a few days prior to making this, and without rules, recipes, or expectations, we joined to execute the most amazing pie I've ever created. Julia made the crust and I made the filling. Together we made magic! 

I invite you to play in the kitchen with friends, lovers, and family. You too can create something delicious, wether you're a self-proclaimed chef or not. All you need is some inspiration, a few ingredients, and some good intentions. 

Ingredients

Crust:

2 cups gluten-free oats

1 cup almonds

2 Tablespoons flax seeds or chia seeds, plus 1/4 cup water

2 Tablespoons pure maple syrup

1 Tablespoon lucuma powder

1/2 teaspoon cinnamon

1/4 teaspoon each ginger, nutmeg, cardamom

1/4 teaspoon himalayan salt

1/4 cup coconut oil, melted


Apple Filling:

5 apples, sliced

¼ cup coconut palm sugar

3 Tablespoons melted coconut oil

2 Tablespoons pure maple syrup

2 Tablespoons lucuma powder

1 teaspoon cinnamon

1 teaspoon cardamom

½ teaspoon reishi powder

Pinch of nutmeg

Pinch of sea salt

Procedure

  1. Preheat oven to 350 F. 

To make crust:

  1. Grind flax or chia in a spice grinder, to make a powder and mix with water to make a gel.
  2. Blend oats and almonds in a high power blender, into a flour. 
  3. Melt down coconut oil, if not already liquid.
  4. Add all ingredients to a large mixing bowl and mix by hand.
  5. Press crust mixture into a pie dish, evenly pinching the sides and set aside.

To make apple filling:

  1. Combine all filling ingredients in a bowl. Taste and adjust flavor/sweetness to your preference.
  2. Pour over crust and spread out evenly in pie pan.
  3. Bake for 45-50 minutes, until crust is slightly browned and apples are cooked through and soft. 

Serve with ice cream. We served it with a homemade Honey Lavender Coconut Ice Cream that I had in my freezer (recipe coming soon!). 

Oat & Pear Muffins

I love fall and all it's glory. So much goodness, nourishment, and warmth. I believe in eating with the seasons since what's in season (locally, wherever you live) is naturally what our bodies need. So although you may love your smoothies and raw foods (I sure do), if you're in cold weather, you might benefit more from cooked local and seasonal foods. 

The San Francisco cool weather sure has me wanting starchier and more grounding foods. Like pears, winter squashes, and persimmons. Yum! 

I gotta say that I'm not the best baker, but I've been surprising myself lately as I get more comfortable with it. 

These muffins are the perfect amount of sweet for a morning or afternoon treat. 

Ingredients

1 cup oat flour (ground up gluten-free oats) or almond flour

1 cup gluten-free rolled oats

1 teaspoon cinnamon

1 teaspoon baking soda

1/4 teaspoon nutmeg

Pinch of sea salt

2 organic pasture-raised eggs

1/2 cup spring water or almond milk

1/4 cup raw honey

1 teaspoon vanilla

2 ripe pears, diced

Coconut palm sugar, to garnish muffins

Procedure

  1. Preheat oven to 350 F. 
  2. Place all dry ingredients in a bowl and mix.
  3. Whisk together eggs, spring water or almond milk, raw honey, and vanilla. 
  4. Pour egg mixture onto dry ingredients and mix to combine well. Add diced pears and mix again. 
  5. Coat muffin molds with coconut oil or organic butter. Pour about 1/4 cup of batter into each mold and garnish with a few pinches of coconut palm sugar. 
  6. Bake for 10-15 minutes, until toothpick comes out clean when inserted into center of muffin. 

Makes 8 muffins. 

Captures of Late Summer Brunch

It's a beautiful thing to prepare a comforting and nourishing meal for like-minded individuals. I'm grateful for the ongoing support and beautiful community that is building from these events. 

Photography by Regina Felice.

We'd love to see you at an upcoming event. 

Buckwheat Noodle Stir-Fry

I'm all about making healthy food taste amazing while spending little time in the kitchen. I have to say I do a pretty good job at it and love sharing that with you so you too can eat healthy on-the-go. 

As you know, I am a personal chef and prepare weekly meals for my clients. When I cook for private clients, I get to make more elaborate and time-consuming dishes, which challenges me in many ways that I love. 

But when I get home from cooking for 5 hours, all I want to do is eat good food and put my feet up. So I've mastered the art of making quick meals for myself with whatever I have in the fridge without jepordizing my health. 

So much can be done with fresh produce and staple ingredients. It just takes a bit of patience with yourself and some mental relaxation to get the creative juices flowing. 

I encourage you to get creative - really, anything goes! If it tastes good, you've mastered cooking. It's meant to be fun. Play with your food, friends. 

This recipe here is one of those easy and very tasty recipes I threw together last week. Enjoy!

Ingredients

12 ounces gluten-free buckwheat (soba) noodles

1 Tablespoon toasted unrefined sesame oil (or extra virgin coconut oil)

1 garlic clove, minced

1/2 white onion, sliced

1 cup brussels sprouts, halved

1 cup wild mushrooms, chopped

1 large red bell pepper, chopped

Splash of coconut aminos or tamari, to taste

Handful spinach

Sea salt and black pepper, to taste

Juice of 1/2 lime

Pinch of dried chili flakes

1 teaspoon sesame seeds, for garnish

Procedure

  1. Cook buckwheat noodles according to package. Drain and toss with a bit of olive oil in pot or large bowl. 
  2. In a pan, heat sesame oil on medium heat. Add garlic and onion, season with a pinch of sea salt and cook for a minute or so. Add brussels sprouts, mushrooms, and bell peppers and continue cooking until tender. Add coconut aminos and spinach and sauté until spinach has wilted. Season with sea salt, black pepper, lime juice, and chili flakes. Taste and adjust to your liking. 
  3. Add vegetables to cooked noodles and toss to combine well. Taste and adjust with lime juice and sea salt if needed. 
  4. Serve and garnish with sesame seeds. 

Serves 4

Colorful Cauliflower Stuffed Bell Peppers

Cauliflower is such a versatile vegetable and so delicious! So much can be done with it besides roasting, such as cauliflower mash and cauliflower rice. This stuffed bell pepper magic I'm sharing with you today is made with 'rice' made out of Romanesco (green cauliflower) and purple cauliflower.

The natural colors of vegetables blow me away sometimes. Every color pigment has it's own purpose and function in the body. The colors literally give our body specific codes as to what to do. 

Can you guess what green and purple color pigments do?

Here's a quick download of each: 

  • Green foods are liver cleansing and detoxifying. Hence why when we think 'detox' or 'cleanse' we think greens. 
  • Purple foods protect the central nervous system, the gut nervous system, and nourish the brain. 

Interesting, right? Nature is smarter than we think at times. Nothing is coincidence. 

This recipe is a variation of my first ever blog post over 3 years ago. What a trip it's been. My meals (and life!) are so much more colorful these days. Transformation is real. 

That's a whole other story. For now, I present to you these very pretty stuffed bell peppers that will color your world.

Ingredients

Cauliflower Stuffing

½ head purple cauliflower, coarsely chopped
½ head green/Romanesque cauliflower, coarsely chopped
1 carrot, diced
1 zucchini or summer squash, diced
¼ cup chopped parsley
2 Tablespoons extra virgin olive oil
Splash of lemon juice
Pinch of sea salt and black pepper

Bell Peppers

• 3 bell peppers, halved longwise, seeds and core removed (type of bell pepper doesn’t matter, but we used 3 types to make it more colorful!)

Tahini Dressing

• ½ cup tahini
• ½ cup spring or filtered water
• 1 clove garlic
• Juice of 1 lemon
• Pinch of sea salt & black pepper

Procedure

1. Preheat oven to 350 degrees F.

2. To make stuffing: Place chopped cauliflower in food processor and process until it resembles rice. Transfer to a bowl and combine with remaining ingredients. Toss, taste and adjust seasoning if needed.

3. To stuff bell peppers: Place prepared bell pepper halves in an oven safe baking dish. Stuff each pepper with cauliflower stuffing. Bake in oven for 25-35 minutes, until bell peppers are tender.

4. To make tahini dressing: Place all ingredients in blender and blend until smooth. If too thick, add more water until you reach desired consistency.

5. Serve stuffed bell peppers warm and drizzle with tahini dressing.

I created this recipe for Oh My Drifter. Photos by Micaela. 

Gluten-Free {Kale} Brownies

There's a secret (not so secret) ingredient in these brownies. Yes, kale. And super delicious! 

I took an Ayurveda workshop this weekend, where I learned about my dosha constitution and what foods were suggested to make me feel better, and what foods could cause an imbalance in my body. Surprisingly, kale was on the 'avoid' list because my body prefers sweet, warming foods. Kale is bitter and can be cooling to the body. Nothing wrong with that, just learning that my body wants warmth and grounding. It's important to listen to the cues it gives us. 

I came home from the workshop, I opened my fridge and saw this large bunch of kale sticking out at me. I wanted to find a creative way to use it that might benefit my body more, so I immediately thought of adding it to a dessert, of course. Any excuse to make dessert. I made two desserts yesterday! Nourishing, refined sugar free, and decadent desserts. Mmmm yes, please. 

I had made kale brownies before but didn't write down the recipe, per usual. This recipe was a completely new - made up by my intuition and the little baking knowledge I have. I'm not a master baker (yet), but these brownies are winners!

Enjoy. 

Ingredients

4 large kale leaves, stems removed

2 large organic eggs

1 teaspoon vanilla 

1/2 cup spring or filtered water

1/2 cup melted coconut oil

1/2 cup pure maple syrup

3/4 cup gluten-free flour (I used a blend of buckwheat and brown rice flours)

3/4 cup raw cacao powder

1/2 cup coconut sugar

1/2 teaspoon baking soda

1/4 teaspoon sea salt

Procedure

  1. Preheat oven to 350 F.
  2. Place first six ingredients in blender or mixer and blend until smooth. 
  3. Transfer to a bowl and whisk in remaining ingredients. 
  4. Line an 8 x 8 baking dish with parchment paper or grease with coconut oil/organic butter. 
  5. Pour mixture into dish and bake for 20-30 minutes, checking at 20 minutes. Brownies are ready when toothpick comes out clean after inserting into middle of dish.
  6. Let cool for 10-15 minutes before cutting into squares. You may also leave it whole and slice like a cake. Sprinkle with shredded or cacao powder to decorate. 


Captures of Sweet & Savory Chocolate Brunch

We had such a wonderful time at our Chocolate Brunch Club in June. Thank you to everyone that helped and got chocolate wasted with us. 

I was a bit afraid that chocolate everything would be overwhelming, but it was such a hit!

Excited for the next Brunch Club coming up in August. Stay tuned. 

Photography by Regina Felice